The Hobbit Nail Art | The Shire
In November, my friend Anjali (From L&P to English Tea) and I took part in NaNoWriMo. NaNo's goal is to write a book in a month, and in order to "win" NaNo, you need to reach 50,000 words. That's about 1,650 words a day, which is pretty achievable, but you really don't want to get behind or else it's near-impossible to catch up. I'd been wanting to write a book since I was 16, but have always had an excuse not to. This seemed like the perfect opportunity, and I figured that even if I don't reach the full 50k I'd still get more down than the measly 3,000 words I managed in high school! Anjali and I decided that whoever had the most words by the end of the month would get to choose something for the other person to do on their blog... and the writing began!
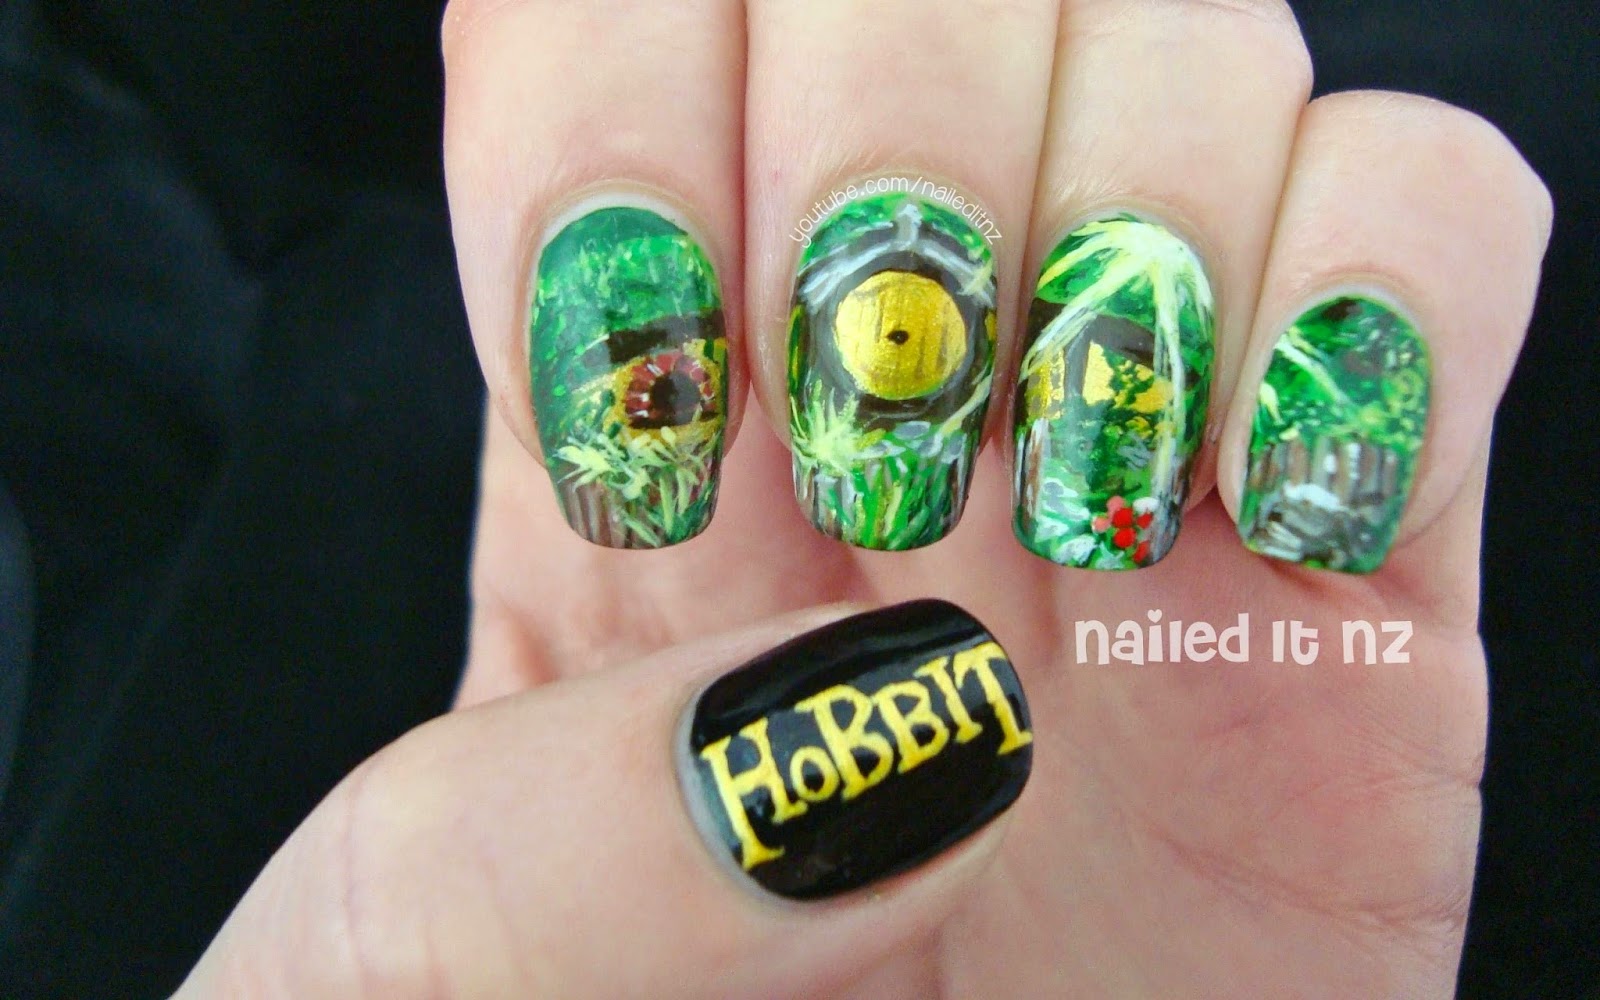
I surprised myself! I was pretty dedicated, each day pumping out my allocated word count and getting excited whenever I reached a milestone. Sometimes I was completely over it though, and would write 1,650 words of rubbish. Still, I kept going. Finally I reached 50,000, a few days before the end of the month. Anjali reached it shortly before me, but I still had a few days where I could have gone hard and attempted to beat her... but after 50,000 words, I was done. Time for a break, I decided, and I happily let her take first place, with a difference of about 1,500 words, if I remember correctly. As her reward for winning, Anjali chose a theme for some detailed nail art, and as you can see she chose The Hobbit!
I wanted to make a video tutorial for this, but it's really hard to film detailed designs - you need to move your hand around too much and it gets really frustrating! Instead, I took pictures as I went and combined them into this step-by-step tutorial. It's the first tutorial I've done this way, so let me know what you think of it. It's not going to be a regular thing for normal nail art, but could be an option for getting designs up that otherwise wouldn't make it to YouTube...
I haven't done any Lord Of The Rings or The Hobbit nail art before, and there's a reason for that. I don't like painting my nails with things that I don't completely love, as it feels like I'm selling myself out. And with LOTR, I always fall asleep while watching it. Seriously, does it have to be so long?! I've read The Hobbit, back when I was a pre-teen but as that was at least ten years ago my memory is a little foggy. So, unlike The Hunger Games and various other popular series, LOTR has never made an appearance here - until now. I'm really glad Anjali asked for me to do these nails, because it prompted me to finally watch The Hobbit. I watched the first one about a week after doing these nails, and realised that it encompasses a whole lot more than just the Shire! I'm now planning on making a nail art series on The Hobbit, and it will definitely include more dragons ☺. I really enjoyed the first two Hobbit movies, and all going to plan I'll be watching the third next week. Then, I'll give Lord Of The Rings another try. No promises that'll work out.
Worst. New Zealander. Ever.

If these photos look a bit strange, please let me know. Alternatively, if they look better than usual, also let me know. I've known for a long time now that my computer screen's brightness levels are a bit... lacking? and no matter how much I play around with it doesn't change; everything looks slightly too dark. That is, of course, until I change computers and am confronted with the glare of my edited pictures. So, if some of my photos in the past have looked massively over-exposed, that's why. I'll keep experimenting and then maybe ask on Facebook and Instagram at some stage as to what people prefer.

I only used one nail polish for this design, and that was for the base colour. It was Green-wich Village by OPI; the rest was done in acrylic paint. I don't usually use that for nail art but I really loved it this time, so it may be making more of an appearance in future manicures!

I hope everyone had a good Christmas! Mine was fantastic ☺.


I hope you like this design and the tutorial, and I'll be back again with some more nail art in a few days.
♥
Wow such amazing detail these nails have.
ReplyDeleteI like this nailart,and I think the pictures are well. I don't think they are too dark, but you have posted too many... 6 pictures of one nailart. That's a lot.
ReplyDeletehello I've just discovered your blog and I think this manicure looks just perfect on your nails :)
ReplyDeleteMy best wishes for 2015! And I'm looking forward to read your posts :)
xx julia