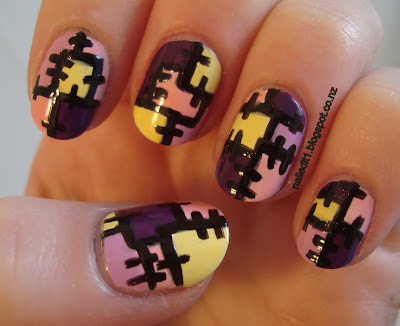
Patchwork nails tutorial
I'm a bit iffy about posting this on here, because since facebook gave me advertising credit the vast majority of the people following or liking Nailed it NZ are on my facebook page! And I feel that may be a better place for showing tutorials rather than here, although this is sooo much easier to work with. If you have an opinion about this, speak up!
Anyway, after asking facebookians if they wanted me to do a tutorial on my last post the answer was yes - and I soon wished I had suggested a nail design I felt more comfortable with!! But all done now.
Obviously, I painted my nails in a patchwork design again. Here's the finished product.
Haha. Good luck reading it! Next time I'll definitely change the font and make it landscape instead of portrait.
Here's a better/less simple tutorial of how to do this.
These are the colours I used the second time round. Of course, you can use any but I thought pastels would be more fitting for patchwork, personally. Oh yeah, that dark purple was annoying the whole way through, contrasted to much with the rest of the colours. But whateeeever, doesn't actually matter.
After a base coat and a coat or two of white (white makes the actual colours more opaque) I painted on the lines that would separate the colours with the black striper polish. These can be any shape really, and if they look a bit munted like mine it doesn't really matter.
The next part is the best part, I reckon. Just using the normal nail polish brushes fill in the shapes. You might need a couple of coats for some colours, depending on your polish. Also, unless you want it that way, try to avoid putting two of the same or similar colours next to each other.
By now your lines are probably looking a bit special, so paint over them again with the striper brush. Almost done! This design looks pretty cool at this stage too.
Finally, paint on the little stitches. Mine are quite thick... I haven't decided if I like it this way or not. Every few stitches stop and look at it from a bit further away - it can look quite over-crowded very easily.
And yay, finished!
I am officially the worst student in the world. I need to study and I just spent ages doing blog stuff. And I have an test for my potential internship tomorrow. Eeeek!
But it's okay, because I ♥ my blog.


Awesome!! I love these!! :D
ReplyDeleteThanks! They take a while though!
Delete